Pruning Backups
Note: This article assumes you have Vorta correctly configured and making backups. If you need help with this, please check out the other Usage articles in the sidebar, or visit the Download page for different install options.
Pruning is one of the more powerful features of Borg, but also can be one of the more dangerous. It’s highly advised that you read the official borg documentation for more information on it before enabling it in your backup workflow.
Step 1 - Launch Vorta
Launch Vorta, open the Archives tab and click on Prune Options And Archive Naming.
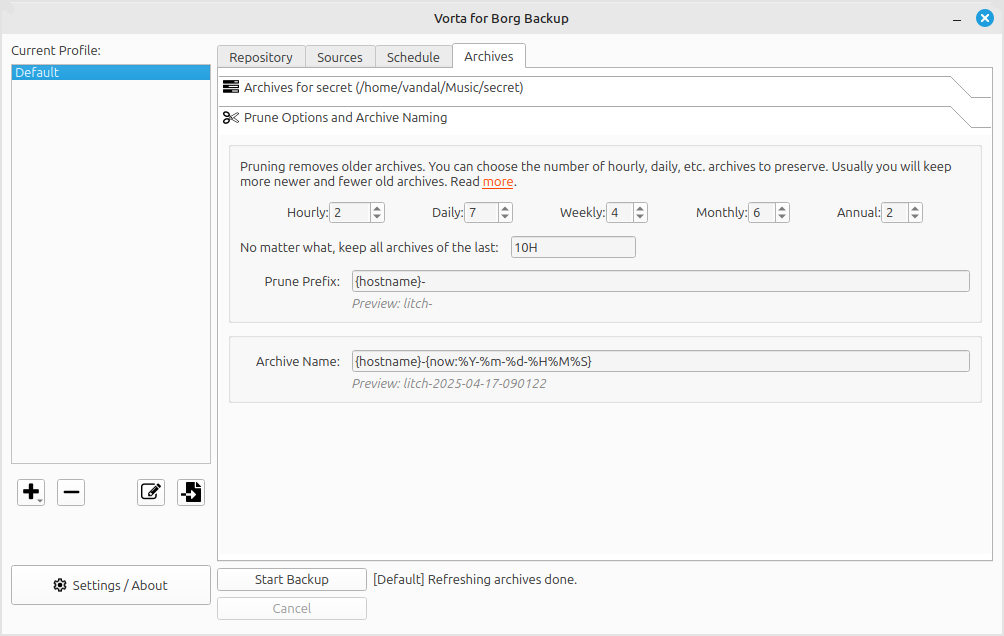
Step 2 - Tweaking the Settings
In a nutshell, the prune options decide what particular archives from your Borg backup get deleted over time. As Vorta says, usually, you will keep more newer and fewer old archives. With pruning, Borg looks at each prune rule before moving on to the next one. Make sure to read the official borg documentation before pruning to know exactly how it works. After tweaking your settings to your liking, it’s time to move to pruning.
Step 3.1 - Manually Pruning
Manually pruning your archives from borg is as simple as clicking on the  button in the Archives tab.
Step 3.2 - Scheduled Pruning
Adding pruning to your backup schedule is as simple as clicking on the Prune after each backup box in the Schedule tab.
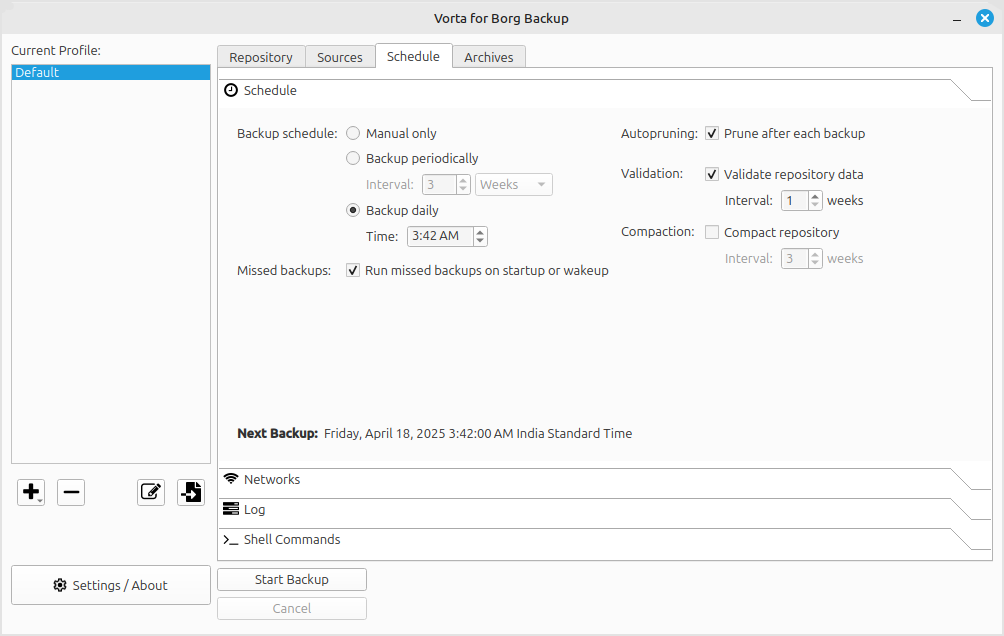
After this, Vorta will prune your archives according to your selected configuration each time it makes a backup.