Restore Files from Backup
Prerequisites
You should think about a future restore scenario before it happens. For a successful restore, you need the following:
- Repo Passphrase or Keyfile: This is the most important. Always keep a copy of your passphrase (when using a repokey) or keyfile in a safe place, off the source machine.
- Vorta and/or Borg Backup Installation: This article assumes you have Vorta correctly configured and making backups. If you need help with this, please check out the other Usage articles in the sidebar, or visit the Download page for different install options.
- Access to the Repo: When using a remote repo, you probably need to set up SSH authentication again. For local repos, the hard drive or file share should be accessible. This is generally less critical. Also note that the private SSH key is only used to connect to the repo and is unrelated to Borg’s own encryption.
Step 1 - Launch Vorta
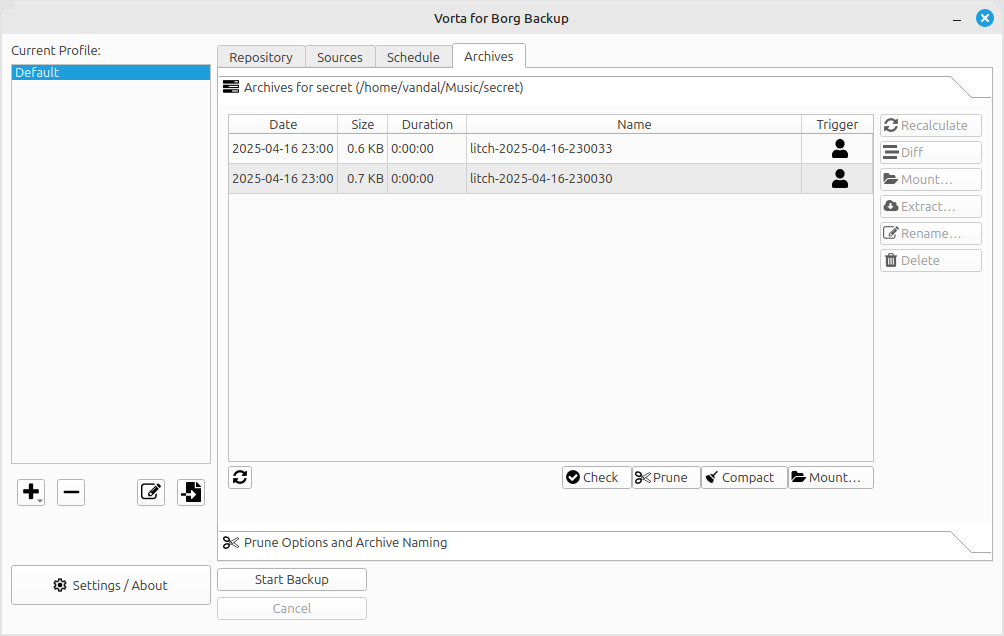
To begin restoring files a snapshot, launch Vorta and click on the Archives tab.
There are two ways to restore files with Vorta, Extracting and Mounting. Both accomplish the same goal, but one may be preferable over the other depending on the situation. This guide will cover both methods.
Step 2.1 - Extracting from an Archive
After opening the Archives tab in Vorta and selecting the snapshot you would like to restore from, click on the Extract button on the right side. After a short wait, the following window should pop up with the files from your backup.

This is the full path of the your backup snapshot–meaning, its the folder you backed up, and all the folders leading up to it. Go through the dialogs and select the folder that you would like to be restored and click on the Extract button.
The next window that comes asks for the Extraction Point, or the location you would like to extract your backup into. Select a location and continue.

Depending how large the extraction is and where its located, this may take anywhere from a few minutes to a few hours. Be patient and let Vorta work its magic. When your extraction is completed, the following message will appear at the bottom of Vorta.

Voilà! After Vorta is done extracting, your selected files should be in the directory that you chose.
Step 2.2 - Mounting a Snapshot
After opening the Archives tab in Vorta and selecting the snapshot you would like to restore from, click on the Mount button at the bottom. After a short wait, the following window should pop up.

Select a mount directory, this will be the directory that Vorta will use to give you access to that backup as if it were still on your filesystem. Make sure it is an empty directory. If you’re not familiar with mounting remote directories, think of it as plugging in a flash drive with your backups on it, and the folder you choose will be the place on your system that you access the files on it from. None of this is permanent, as the folder can always be unmounted and changed later.
Once the snapshot is finished mounting, the following message should appear in Vorta:

Note: If you encounter errors while attempting to mount a backup (e.g.
borg mount not available: no FUSE supportorfuse: failed to exec fusermount3), it’s likely due to missing FUSE support on your system.
This means you are now able to access the snapshot you selected via the mount folder that you chose. Using your favorite file manager, you can now copy and paste the files you would like to restore, directly from the archive!

Note: The speed of this depends on whether your backups are local or remote, and the speed of your connection.
When you are finished restoring your files, close out all of your active windows, and hit the Unmount button.