Setting up Vorta for Remote Backups
Update Dec 2020: Privacy- and security researcher Sun Knudsen made a nice introductory video on how to get started with Vorta and BorgBase on macOS. Recommended if you prefer a video and some more background. Watch it here.
Step 1 – Download Vorta
Visit the Install page for different install options.
If you chose the binary image for macOS, you will see the following installer image after downloading:
After starting Vorta, you will see a new icon in your menu bar and a new settings window.
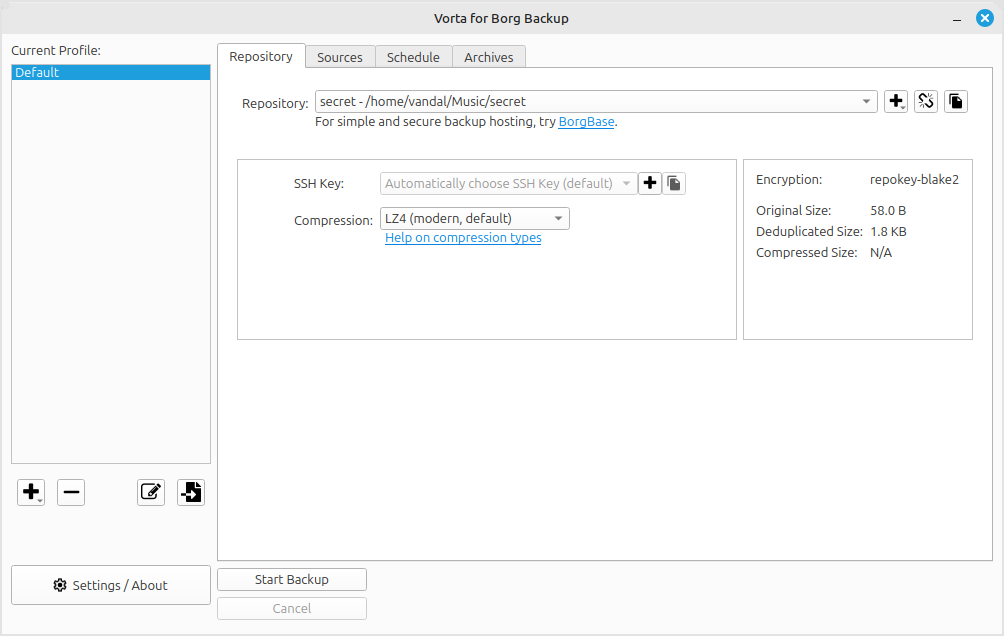
This is where you will configure your SSH key and remote backup repository in steps 2 and 3.
Step 2 – Setting up a SSH Key
SSH keys are used to log into remote servers without using a password. Vorta uses a SSH key to securely connect to your backup repository. A SSH key consists of 2 parts: A private and a public key. The private key should be kept securely on your computer. The public key can be shared, so you can log in to your remote backup repository.
Vorta makes it simple to create a new public-private keypair. Simply click the Add button next to the SSH Key section from the settings window. This will open a new window to generate a new key and configure its options. Generally the defaults are the best options, and there is no reason to change them.
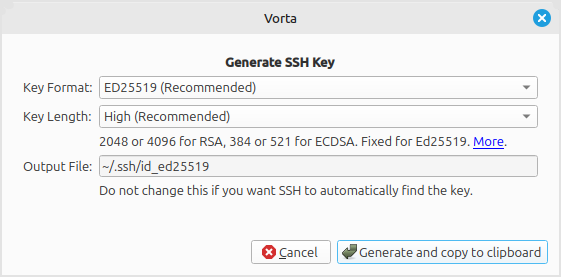
If you already use SSH and have your own keys, just keep the SSH Key setting at the default and any available keys will be used automatically.
After clicking Generate and Copy to Clipboard, the public part of your key will be in the clipboard. You can paste it anywhere using ⌘+V in Mac or Ctrl+V for Linux.
Step 3 – Add Remote Backup Repository
Now you are ready to add the place that will store your backups – also called backup repository or repo for short. Vorta works with any repo. So you could use your existing server. It just needs SSH configured and the Borg command line tool installed.
Another option is to use BorgBase.com, which is a specialized hosting service just for Borg. It offers some advantages over private servers, like monitoring for inactive backups, secure separation of repo data and append-only repos.
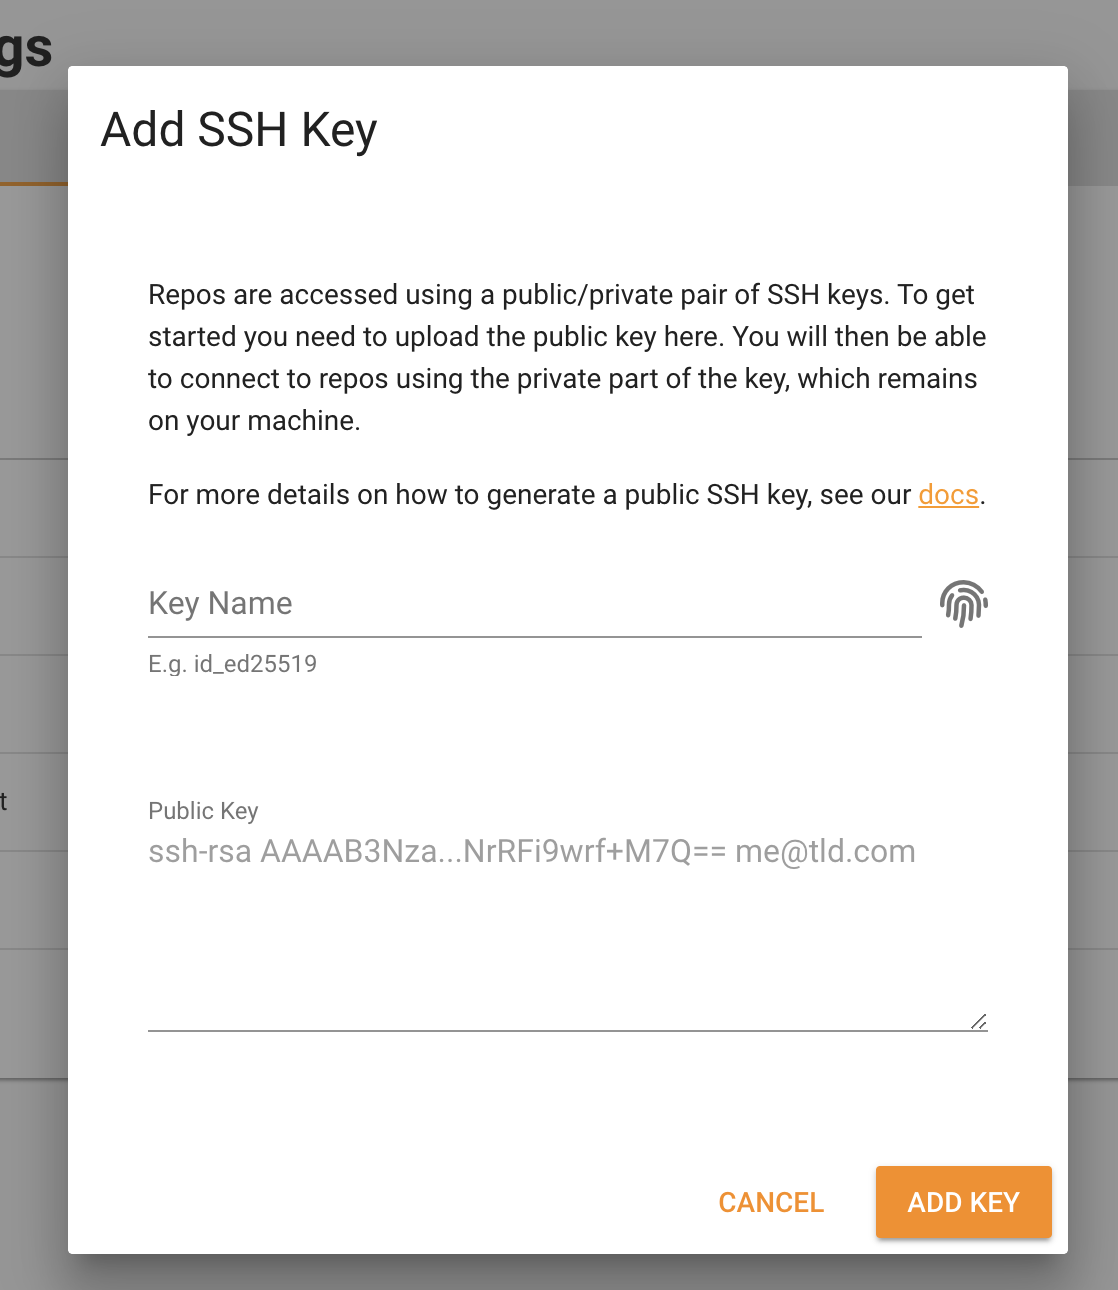
When using BorgBase, navigate to Account > SSH Keys to add your new key. For name, you can use anything. E.g. “My Macbook”. In the key-field, just paste the public key that was copied to the clipboard before.
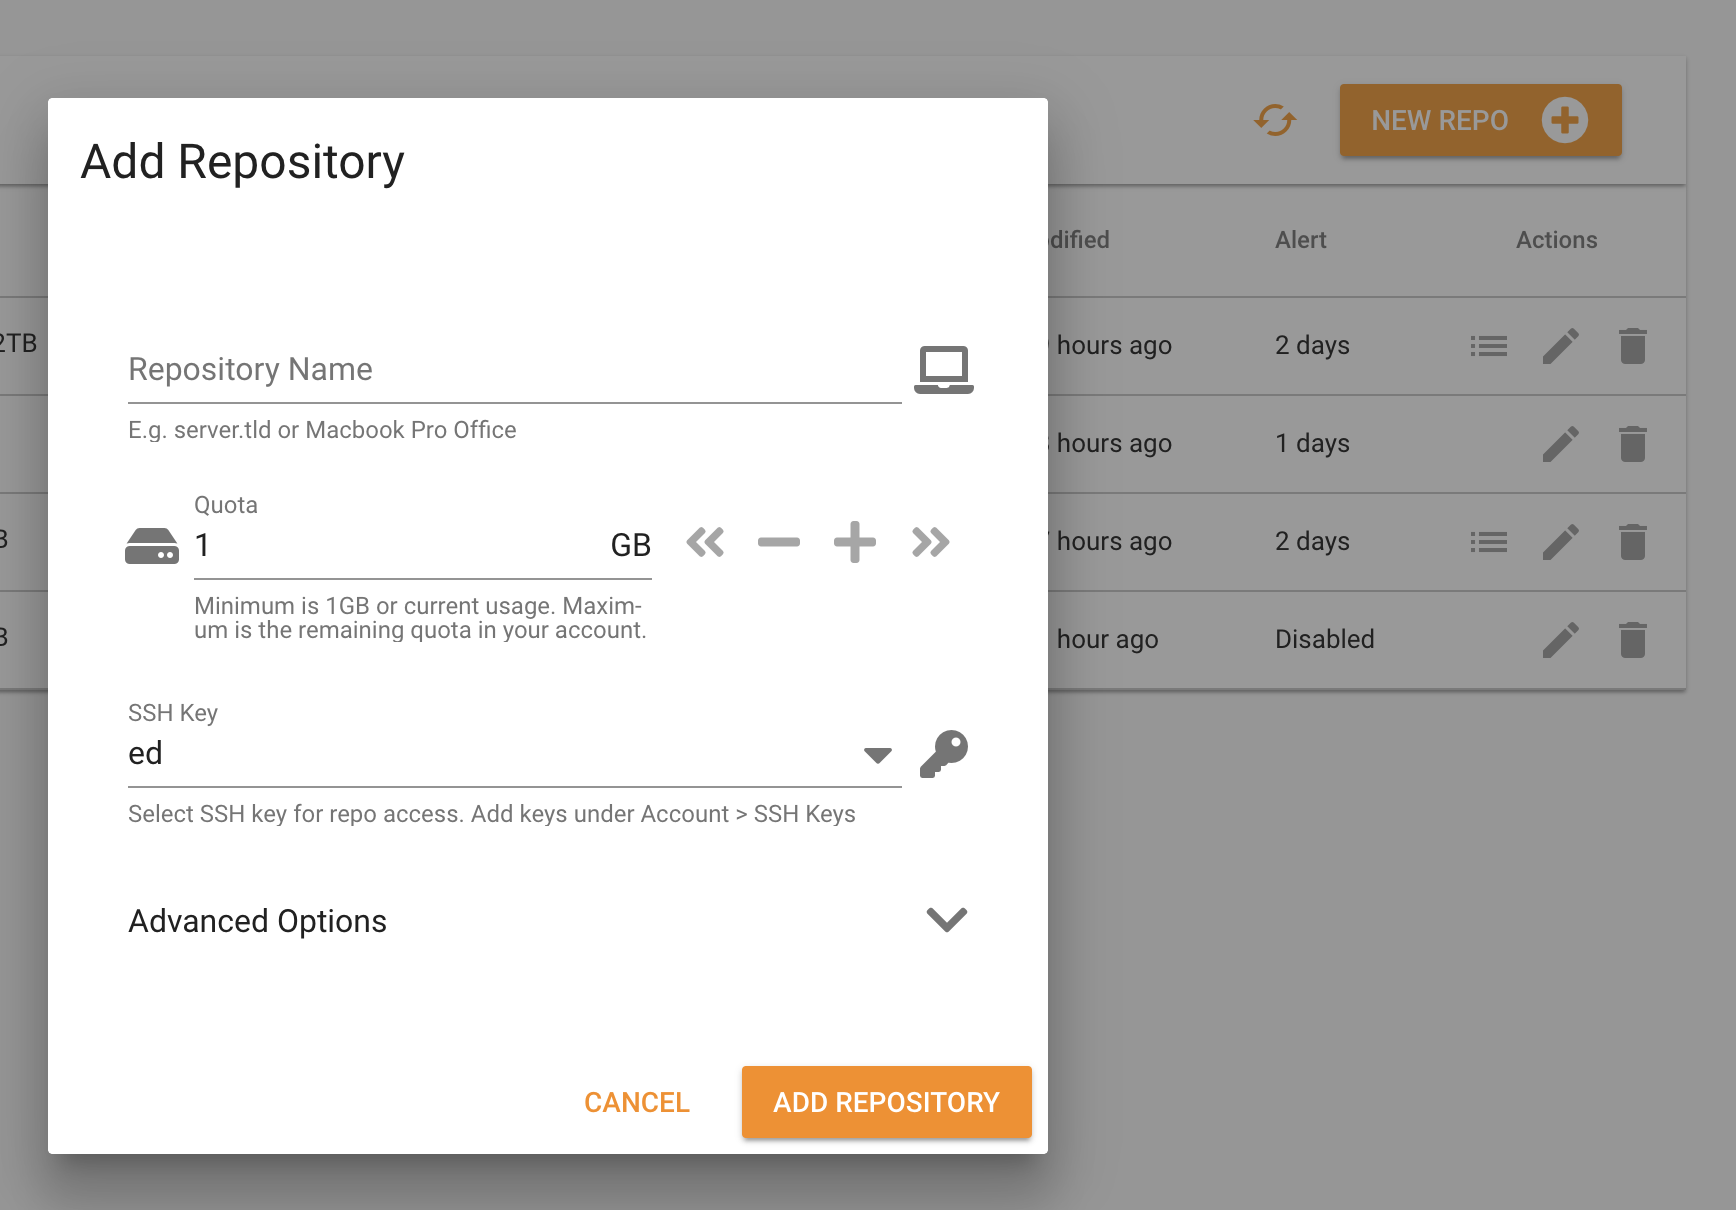
Next go to Repositories and choose New Repo. There just make sure to choose the key you previously created and adjust any options, like server location and available space.
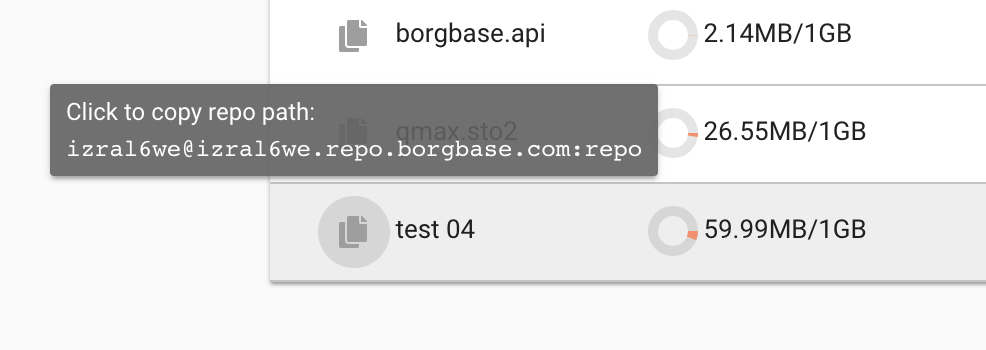
After adding the repo, you can easily copy the Repo URL by clicking the left icon in the row of the repo. The Repo URL is the address where your backup data can be accessed.
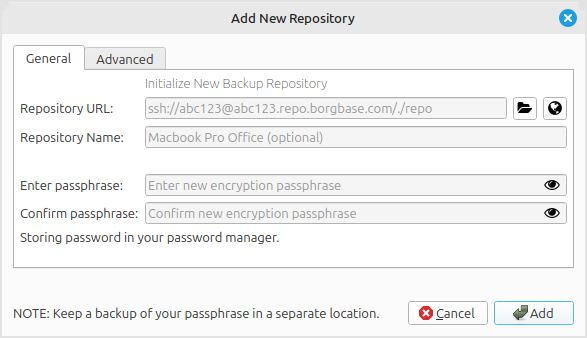
With the Repo URL in the clipboard, we can move back to Vorta and click on the Add Repository drop-down menu, and select “New Repository…”. After clicking, a new window should pop up. This will set up a new repo. We could also connect to an existing repo.
In the dialog, paste the Repo URL and choose a secure password. If you don’t have specific encryption requirements and didn’t change the default name of the SSH key, you can keep the other settings at their defaults.
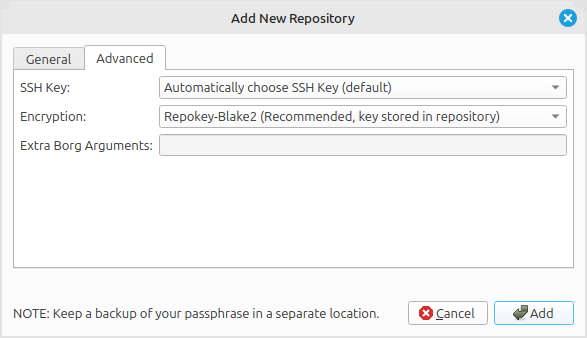
Also, make sure to choose the key you previously created and adjust any options, like server location and available space, in the Advanced tab.
Step 4 – Add folders to back up
With your repo settings in place, you can now add some backup folders and make your first backup. Navigate to the Sources tab to add some folders or exclusions.
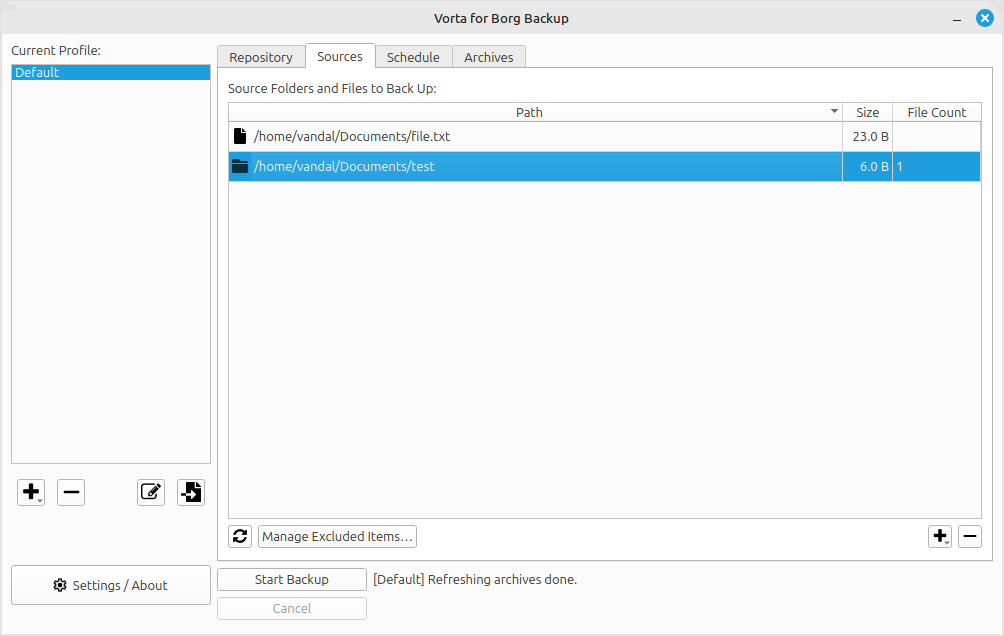
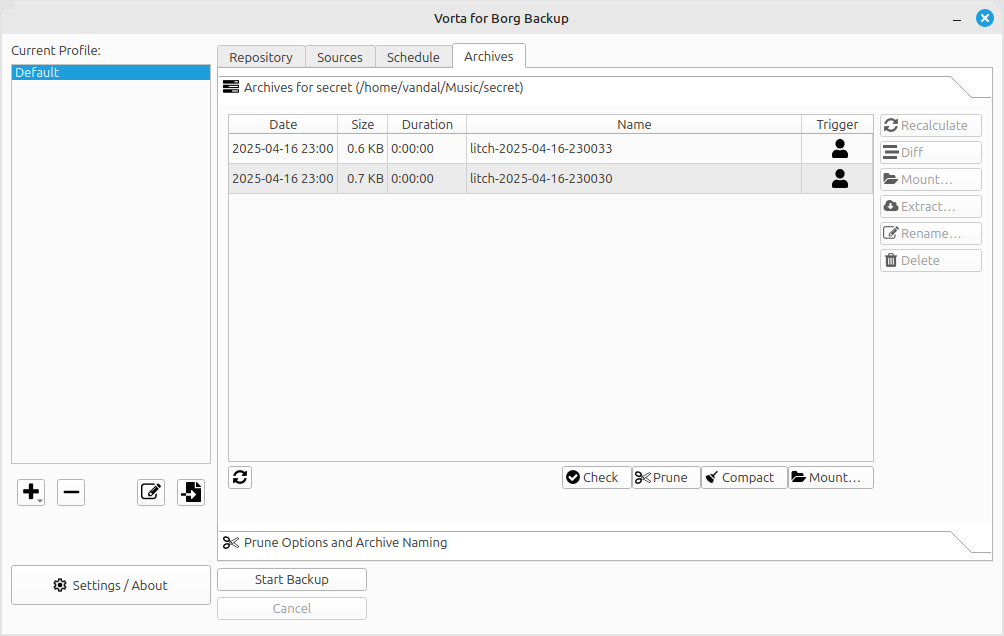
Next press Start Backup to do your first backup. After every successful backup (or snapshot), a new line will be added to the Archives tab. There you can also mount a snapshot and restore files.
Conclusion
After you have validated that everything works as expected, you can put your backups on auto-pilot. If you chose BorgBase.com as repo provider, you can set alerts to be notified if your backups stop working for longer than X days.